TheChiefMeat

Guide to OBS Voicemeeter Audio Setup


Introduction

Below you can find all of the information I use for various projects and hobbies, including streaming and audio software. This page will be updated as often as possible to include any new additions, refer to the below changlog for reference.

Also included is a standalone version of this guide which will be updated alongside this online version for those that would like it Found here.


Changlog & New Additions

Version 0.2 Changes:

[19th of August 2017]

Finished Audio Setup with OBS & Voicemeeter Banana Pro Guide.

Version 0.1 Changes:

[2nd of August 2017]
Finished OBS Overview & Installation guide.

Started Audio Setup with OBS & Voicemeeter Banana Pro Guide.

[1st of August 2017]

Initial Version; Added OBS Overview & Installation.


OBS Overview & Installation

Before we start with the basic overview and setup of OBS, please ensure you have the following before proceding. It is recommended to have this page open on one side of your monitor and OBS on the other side as you follow the guide.

Requirements:

The latest version of OBS (found here)
Twitch Stream Key (this can be found on your Twitch Dashboard).

Follow the on screen instructions for OBS during the installation process, once the installation is finished continue following this guide.

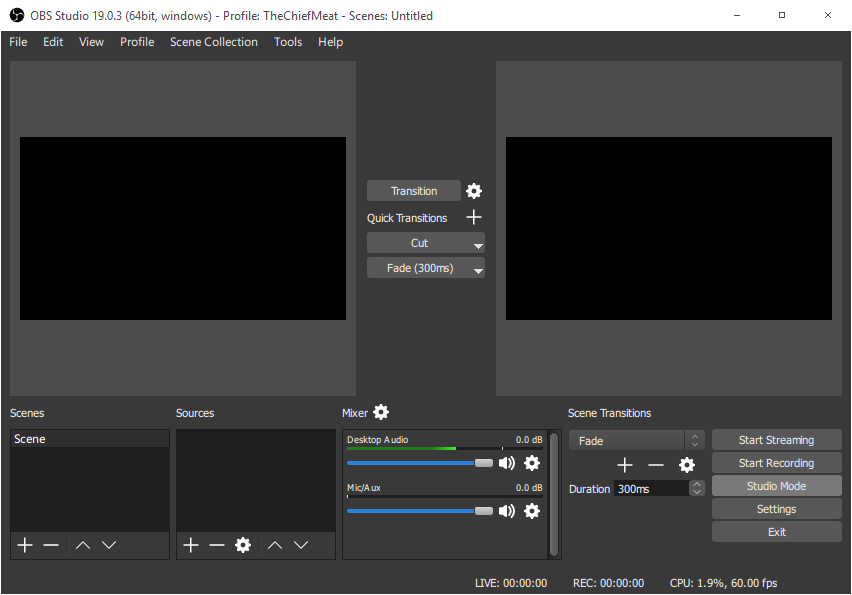
Now that OBS is installed, let's go over the main interface as well as the menus.


Basic Setup

The first thing we will want to do is create both a profile and a scene collection for ourselves, as well a local folder that we will use to store all of our pictures, gifs, overlays and any other files you might use with OBS, this will allow you to keep all the relevant files in one easy location.

This tutorial will assume that you already know how to setup scenes within OBS, so I'll be moving straight to the settings menu, which can be found under the files menu.

Here we can see the General settings menu, most of which we will be glossing over as most of the settings here are changed due to personal preference. If your PC is capable of recording and streaming at the same time (note that this can have result in significant CPU usage) then feel free to check the "Automatically record when streaming" option so you always have a backup of all your streams.


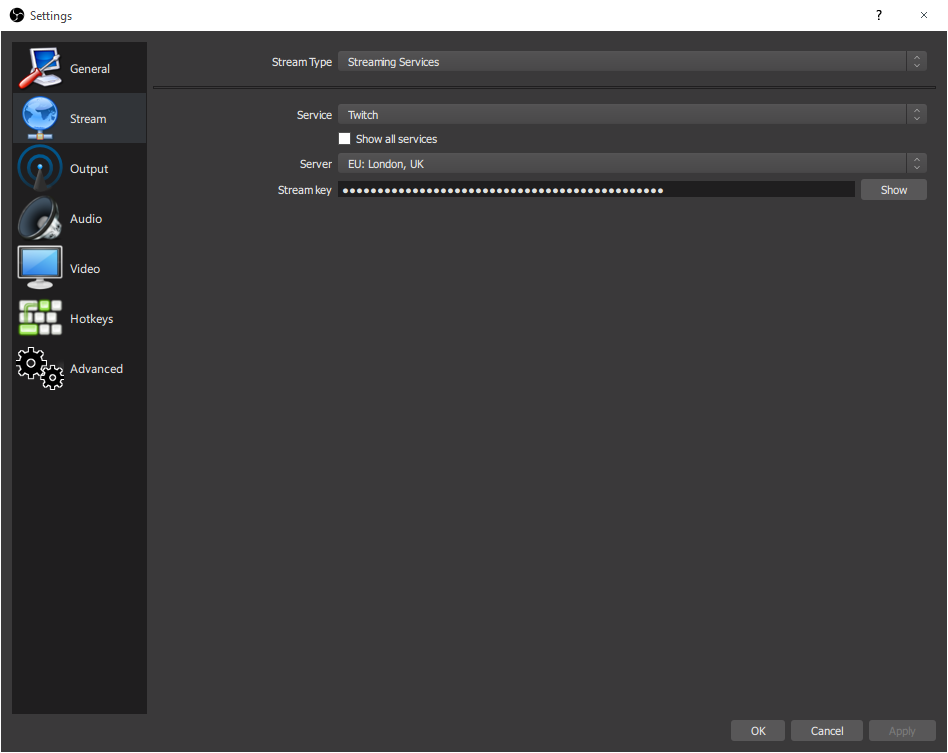
This is the Stream menu, which we won't spend much time in at all. Simply select the nearest Twitch server that is available to you and enter your stream key into the provided box.


720p Recommended Setup

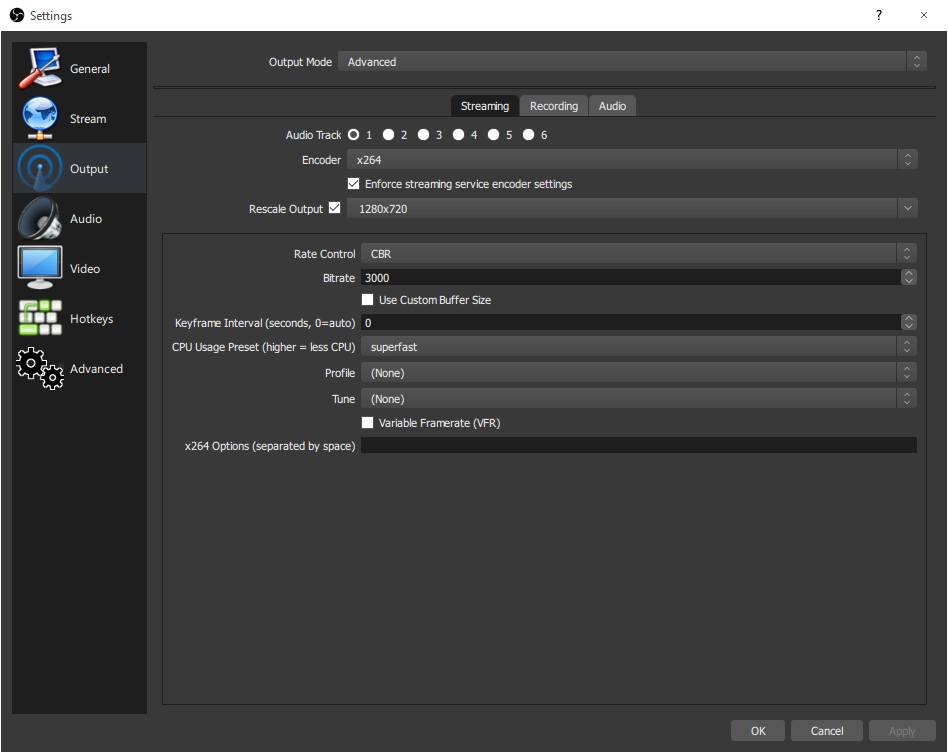
The ouput menu is where we will be spending most of our time. Switching to the advanced menu is recommended here so we both have the same view of this screen.

Encoder: x264 - The x264 encoder gives high quality video playback with minimal tearing and screen blockyness, in exchange for higher CPU usage. This is the default recommended encoder to use on modern systems as most PCs are equipped with 4+ core CPUs.

Rescale Output: 1280x720 - This resolution offers good parity between quality and performance, depending on the provided bitrate (covered later).

Rate Control: CBR - CBR (Constant Bit-Rate) is recommended by Twitch as the default setting when connecting to their servers, as such that is our setting.

Bitrate: 2500/3500 - 2500 to 3500kbps (Kilobits per second) is a healthy middle ground between performance for the CPU and clarity for the viewer. When selecting your bitrate, take note that some viewers who may be watching could be watching on a poor connection, and as such might not be able to view your stream at all if you push the bitrate too far.

I would recommend taking note if viewers tell you that they are experiencing stutters or even interrupted playback as this may be due to you using a high bitrate, especially if you're a non-partnered streamer or someone that doesn't have access to the quality settings (this is usually due to the amount of viewers in your stream, too low and the quality settings won't show up for the viewers).

If you are a partnered streamer, going past the 3500 bitrate mark is recommended if your PC can handle it. This will benefit those that have the internet connection to support it, and other viewers will be able to select a low quality preset while watching your stream.

CPU Usage Preset: Superfast/Veryfast - This setting is entirely dependant on your CPU, so you may have to fiddle around with this particular setting. Simply put, the lower your preset, the more OBS will utilise your CPU, causing CPU usage to increase, but with the added benefit of a better quality stream. Those on lower end CPUs will be bound to the top three presets as CPUs will 4 cores or less will suffer greatly on the more intensive presets.

All other settings on this page will not be touched. Under the recording tab you'll find similar settings for recordings. Generally speaking I use the Nvidia NVENC encoder with a bitrate of about 20,000-30,000kbps as these recordings will be uploaded instead of streamed.

Finally we have the audio tab, with I usually set to 320kbps for all channels.


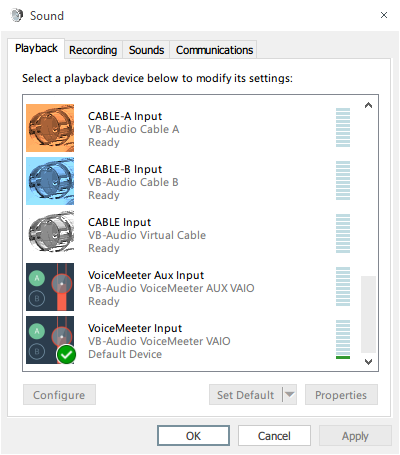
Under the audio menu we'll find a few settings for our sample rate as well as desktop and microphone devices. For now we simply want to make sure that the sample rate matches that of our current device (you can find this information by going to Control Panel\All Control Panel Items\Sound on your PC, right clicking on your active speakers, going to the advanced tab and look at the default sample rate.

Most if not all people will have a sample rate of 41000Hz, so in OBS we want to ensure that 44.1khz is selected.

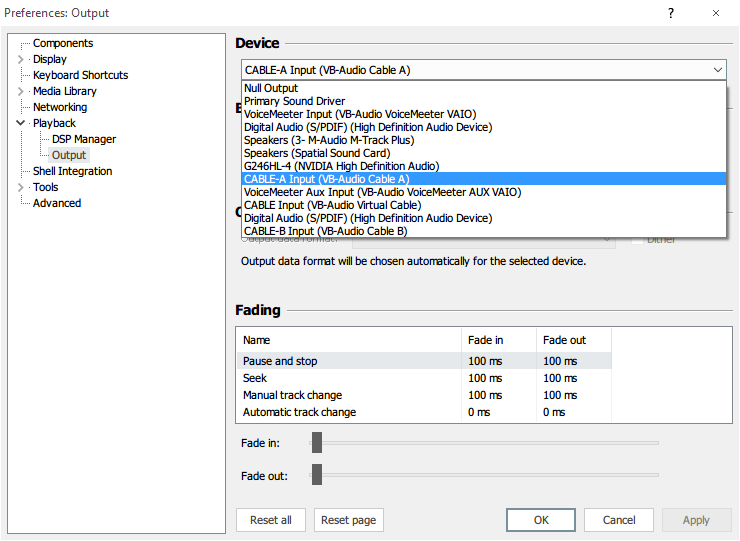
If you're planning on using the Voicemeeter Banana mixer as detailed in the tutorial included with this guide, feel free to skip the following, if not then simply select your microphone in the "Mic/Auxiliary Audio Device" tab.


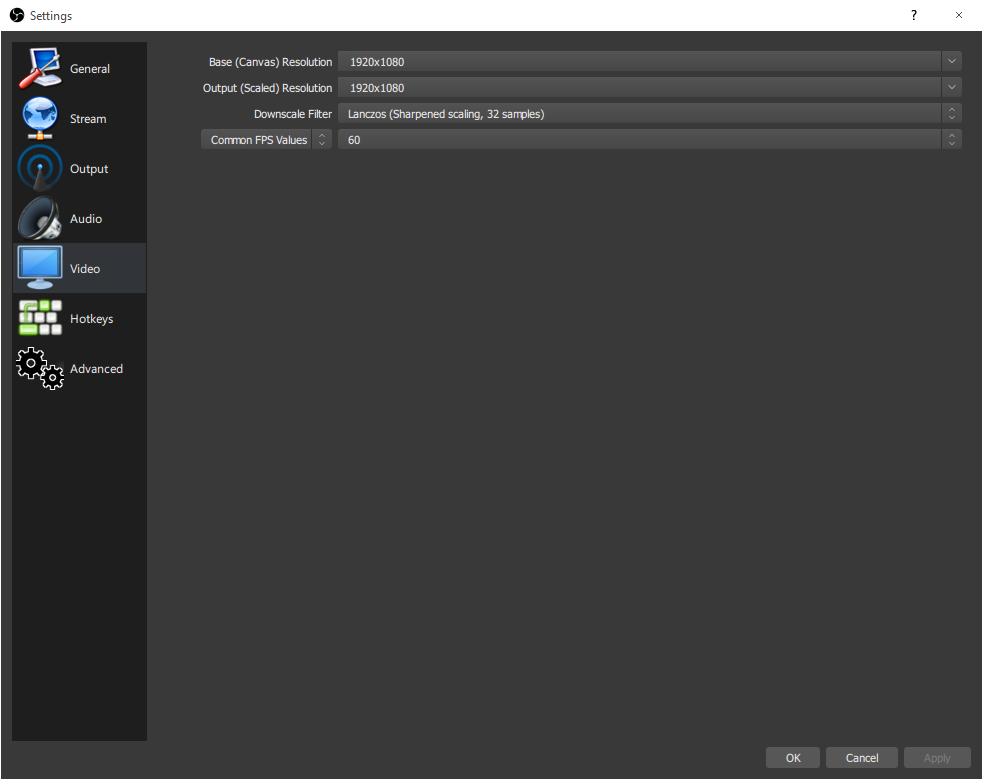
Under the video menu, not much has to be changed. The Base (Canvas) Resolution should always match your monitor resolution, and the Output (Scaled) Resolution should match the Rescale Ouput resolution you set in the Output menu, unless you plan to record your streams, in which case it should match the Base (Canvas) Resolution for the best possible looking recordings.


The hotkeys menu has a few keys that you might find useful to bind, such as the Mute and Unmute hotkeys for your microphone, I usually have these bound to a single button on my mouse so I can easily mute my microphone when needed.


This covers the basics of the OBS settings menu. The advanced menu has little to cover and once again is mostly for personal preference and troubleshooting (such as the low latency mode). If you want feel free to fiddle around with these settings, but I'd recommend leaving them as they are.

Audio Setup with OBS & Voicemeeter Banana Pro

This section will cover setting up Voicemeeter Banana Pro with OBS using both Voicemeeter Banana Pro and Virtual Audio Cables. Please note that in order to continue with this tutorial, you will need additional software (linked below) which does require a donation to the creator of said software.

Requirements:

Voicemeeter Banana Pro (Website)

Virtual Audio Cables (required donation for complete setup, one free cable download)

Once you gone ahead and donated, you should recieve an email with a link for the two additional cables. Back these files up along with the other downloaded files!

Once you have download the files go ahead and create a folder on the desktop for your convenience, you should have the following four files:

VBCABLE_A_Driver_Pack43.zip
VBCABLE_B_Driver_Pack43.zip
VBCABLE_Driver_Pack43.zip

VoicemeeterProSetup.exe

Go ahead and run the VoicemeeterProSetup.exe as an Administrator and complete the setup, then extract the zip files into their own folders (using something like 7zip) and run each of the three Setup_x64.exe files as an Administrator for each of the three cables.

Once completed go ahead and restart your PC.

At this point you'll have no audio at all for any application, so lets go ahead and fix that. The first thing we want to do is open the Windows Sound menu shown below. Set the VoiceMeeter Input and VoiceMeeter Output as the default Playback and Recording devices.


Now that we have the default audio set for the mixer, we can go ahead and open it up, either by the desktop shortcut or by launching Voicemeeter Banana from the Windows Start Menu.


To begin with we need to understand the very basics. At the top right of the mixer you can find three outputs for audio, A1, A2 & A3. Press the A1 button and a drop-down menu will appear with the possible audio outputs, as we're trying to get basic audio back, select your speakers/headphones that you usually use for audio output (if there are two identical names for your output, select the MME version).

Go ahead and open up a YouTube video and comfirm that the audio is now working. What you should see is the Voicemeeter VAIO mixer (found in the centre of the panel) is now displaying the current audio levels, feel free to use the slider to adjust the audio, double-clicking the slider will bring it back to 0dB. This slider is going to be used for most of the audio coming through your PC, so consider it as the default audio slider.

Next to the slider you'll find three other buttons, also called A1, A2 & A3. These buttons correspond to the three output buttons; you'll notice that if you turn off the A1 button, you can no longer hear the audio playing, we'll use this later to allow us to pass through audio to the stream that we want our viewers to hear, and to block audio we may not want them to hear.

Now that we have basic audio working again, it's time to setup our music player. To the left of the slider we just played around with are three other sliders (I'm using the centre slider), we can use these for other programs and have individual control over their sound levels, and if the stream hears the audio or not. Go ahead and open your selected audio player and find the audio output menu (obviously all audio players are different). We want to send the audio down a virtual cable instead of to our speakers, so select any of the virtual cables (I'm using CABLE-A) in the drop down menu (I'm using Foobar2000 in this example).


Now that our music player is routing its audio to the virtual cable, we need to assign one of the sliders to that cable, to do this choose a slider, and at the top of the slider where it says "Select Input Device" click and choose the cable we used in the audio player (as seen below).

Now that our slider has the correct cable assigned to it, we should be able to hear any music played with our audio player. go ahead and test out the slider, as well as turning on and off the A1 button just like we did before so that you can hear the music.

Now that our audio player has been setup, we can do the same for our microphone. Go ahead and choose another slider (I'm using the right slider) and select your microphone just like we did before from the dropdown menu. Now that your microphone is selected go ahead and listen to yourself by enabling the A1 button (watch out for feedback if you've got your speakers on!)

Congratulations, you've now got your microphone and your audio ready to go! All that's left to do now is to send this audio to OBS. To do this we need to setup another ouput. In the top right of the mixer go ahead and press the A2 button and select the last unused cable (if you've been following along, this should be CABLE Input) and assign it to the A2 button.

Finally all we have to do is open up OBS and in the audio menu assign our Desktop Audio Device to the "CABLE Input" (This is our A2 ouput in the mixer).

Everything is now complete! To send audio to the stream, simply enable to A2 button the slider, and to let yourself hear it, press A1 (below I've added a small guide image to help).

As a final step, you can right click where it says "HARDWARE INPUT 3" at the top and write in a name for each of the two sliders (Music, Microphone) so you can more easily remember which is which.

I hope this guide helped you setup the basic of audio routing with Voicemeeter! If you have any questions feel free to leave them in the comments below, or contact me on Discord or Twitter!